Excel Macro Tutorial 6 – Add macro buttons to your toolbar
The finishing touch will be to put your macros into the toolbar, so they will be available to you every time you open up excel.
I have been working with Excel 2007 in these tutorials but up to this point everything I have shown you will work with 2003 and most other versions. With 2007 Microsoft removed the ability to (without tricky tweaking) make a custom drop-down menu in Excel. But they did make it easy to add a custom button to the quick access bar for a single macro. For a great tutorial on adding custom menus to 2003 see this page: Assign a Macro to a Toolbar or Menu. For 2007 see my tutorial below.
Adding a custom macro button to the Excel 2007 quick access toolbar:
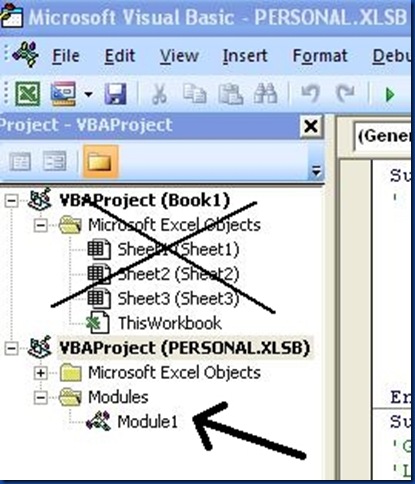
The first thing to do is make sure you’ve been putting your macro code in the right place. If you put the code in the workbook it will be available to anyone who opens that file. But in this example we open and process a new workbook every day. So we should put the code in our personal macro file. This makes it available to you every time you open Excel. Open the visual basic editor to look at your files:
 If you have been putting your code in a workbook, or someone shared a workbook with you with macros in it, you can simply copy and paste the code into ‘Module1’ of your PERSONAL.XLSB file.
(Note: Don’t have a PERSONAL.XLSB? Here are instructions on creating one: How to create a Personal.xlsb )
After making sure the code is in personal.xlsb, it is easy to add quick access buttons to your macros.
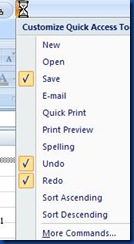
Click on the down arrow button on your quick access toolbar:

Click ‘More Commands…’
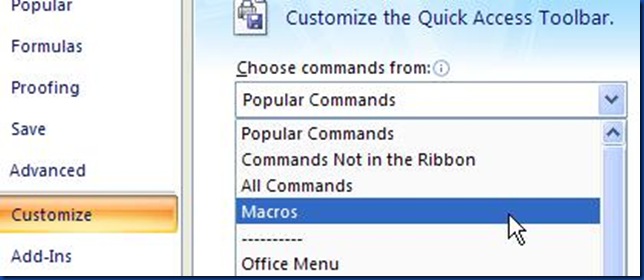
From the ‘Choose commands from’ drop-down select ‘Macros’

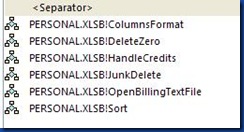
All of the macros in your Personal.xlsb file should be listed:

Now you can simply click each one and add it to your toolbar.
The toolbar ends up looking something like this:

Go back to the quick access options by clicking ‘More Commands’ again. You can change the icon for any item by selecting it and clicking the ‘Modify’ button. Here is how my toolbar looked after modifying:

Well that’s it! Now a task that took 5-10 minutes per report can be done in about 30 seconds. What will you do with all your extra time?
Can you think of any improvements for this set of macros?
Download all the macros covered in this tutorial:
Here is my Personal.xlsb file containing a slightly improved version of all the macros in this tutorial: PERSONAL.XLSB
Here is an excel workbook with fake patients you can test the macros out on: FakeBillingReport.xlsx
Here is a macro-enabled excel workbook with the code in the workbook: FakeBillingReport.xlsm (macros inside) (in case you had trouble getting to the macros in PERSONAL.xlsb).
One thought on “Excel Macro Tutorial 6 – Add macro buttons to your toolbar”